Introduction to Cookie Butter Icebox Cake
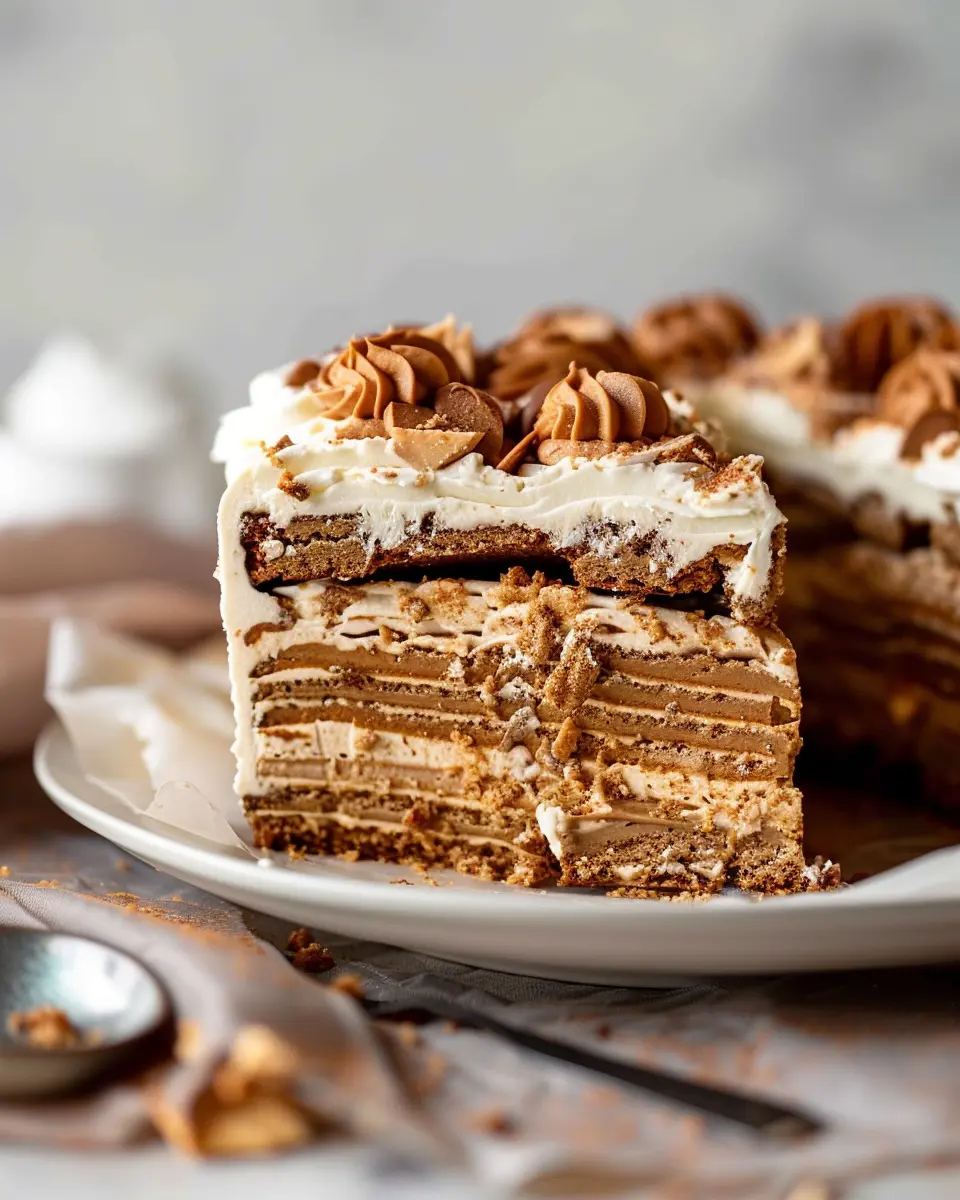
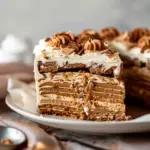
If you’re on the hunt for a show-stopping dessert that’s both easy to prepare and utterly delicious, look no further than the cookie butter icebox cake. This no-bake treat is the superhero of desserts—combining the creamy richness of cookie butter with layers of cookies that soften and meld together for a harmonious flavor. But what makes this cake truly special? Let’s dive into it!
Why is Cookie Butter Icebox Cake the perfect dessert?
The cookie butter icebox cake shines for several reasons. First, it’s a breeze to make, making it an ideal choice for busy young professionals. With minimal prep time and no baking required, you can whip it up in a flash, allowing you more time to kick back and enjoy with friends or family. Imagine inviting guests over and presenting them with this elegant dessert, only to reveal how simple it was to make!
Here’s why you’ll love it:
-
Versatile Ingredients: You can easily customize this cake based on dietary preferences. Trader Joe’s speculoos cookie butter is a fan-favorite, but there are plenty of brands to choose from. Plus, you can swap out standard cookies for gluten-free options or experiment with different flavors.
-
Make-Ahead Convenience: The beauty of an icebox cake lies in its ability to be prepared ahead of time. It actually improves in flavor after sitting in the fridge for a few hours or overnight, saving you the stress of last-minute dessert prep.
-
Perfect for Any Occasion: Whether it’s a casual weeknight dinner or a festive gathering, this decadent treat fits right in. You can even dress it up with fresh fruit, whipped cream, or chocolate drizzle for an extra touch of elegance.
Did you know that the No-Bake Dessert category has gained popularity among millennials? It’s true! Many have embraced this fun and delicious way of enjoying dessert without the hassle.
Keep reading for the full recipe and tips on how to elevate your cookie butter icebox cake experience!
Ingredients for Cookie Butter Icebox Cake
When it comes to crafting a decadent cookie butter icebox cake, having the right ingredients is key. This delightful dessert layers flavors and textures to create a memorable treat. Let’s break down what you’ll need to whip up this indulgent cake.
Essential Ingredients for a Rich Icebox Cake
- Cookie Butter: The star of the show! Look for a creamy spread, like the popular Biscoff or Speculoos. It adds that wonderfully warm spice and sweetness.
- Cream Cheese: Use full-fat cream cheese to achieve a rich, smooth filling. It balances the sweetness and adds a tangy depth.
- Whipped Topping: A tub of whipped topping will make your cake light and airy. You can also make homemade whipped cream for a more personalized touch.
- Graham Crackers: These provide the base and structure for your icebox cake. Choose plain or cinnamon-flavored for an extra kick.
- Milk: Needed for soaking the graham crackers, use whole or 2% milk for the best consistency.
Gathering these essentials will set you on the right path for creating a delicious cookie butter icebox cake that will impress friends and family alike. If you’re looking for more cookie butter inspirations, check out great ideas from The Cookie Butter Co.!
Preparing Cookie Butter Icebox Cake
Are you ready to dive into the scrumptious world of dessert? If you’ve never prepared a cookie butter icebox cake, you’re in for a delight! This no-bake dessert is not only easy to whip up but also a crowd-pleaser that’s perfect for gatherings or a cozy night in. So, let’s roll up our sleeves and get started on this sweet adventure.
Gather Your Equipment
To begin your journey into cookie butter bliss, you’ll need some basic kitchen tools. Here’s what you should have on hand:
- Mixing bowls: At least two sizes — one for whipping cream and another for combining ingredients.
- Electric mixer: This will make whipping the heavy cream a breeze. Hand whisking might just tire you out before the cake even gets made!
- Spatula or spoon: For folding and mixing without losing that fluffy texture.
- 9×13-inch baking dish: Perfect for layering your cake.
- Plastic wrap: To cover the cake while it chills.
Make sure your equipment is ready; you don’t want to have to run to the store halfway through making your cookie butter icebox cake.
Whip the Heavy Cream
Now it’s time to whip up that luscious heavy cream!
- Chill your bowl and beaters: This step helps in achieving better volume when whipping the cream.
- Pour about 2 cups of heavy cream into your chilled bowl.
- Start mixing on medium speed, gradually increasing to high until soft peaks form. This should take about 3-5 minutes. Remember, over-whipped cream can turn grainy, so keep an eye on it!
Whipped cream is a fantastic base for your cake, adding an airy texture that beautifully melds with cookie butter.
Mix in Cookie Butter and Mascarpone
As the whipped cream reaches soft peaks, it’s time to introduce the star components of your cookie butter icebox cake:
- Add in 1 cup of cookie butter. This unique spread adds an incredibly rich flavor profile.
- Incorporate 1 cup of mascarpone cheese for extra creaminess.
Gently fold these ingredients into the whipped cream. The goal here is to combine everything without deflating the air you just whipped into the cream. If you want to learn more about mascarpone and its uses, check out Serious Eats.
Assemble the Icebox Cake
With your creamy mixture ready, it’s assembly time:
- Layer your ingredients: Start with a layer of the cookie butter mixture at the bottom of your baking dish.
- Add a layer of cookies: Use store-bought speculoos cookies or similar treats. Dip each cookie briefly in milk or almond milk for that soft, melt-in-your-mouth experience.
- Repeat the process: Alternate between layers of cream and cookies until you reach the top of your dish. Aim for about three layers.
- Finish off with the remaining whipped mixture on top, smoothing it out as you go.
Your cookie butter icebox cake is shaping up beautifully!
Refrigerate and Let It Set
We’re almost there! Now that your cake is assembled, it’s time for the most crucial aspect: chilling.
- Cover the dish tightly with plastic wrap. This helps prevent any fridge odors from sneaking into your masterpiece.
- Let it chill for at least 4 hours, or overnight if you can hold off. Patience is key here. As it sets, the flavors meld beautifully, and the cookies soften to perfection.
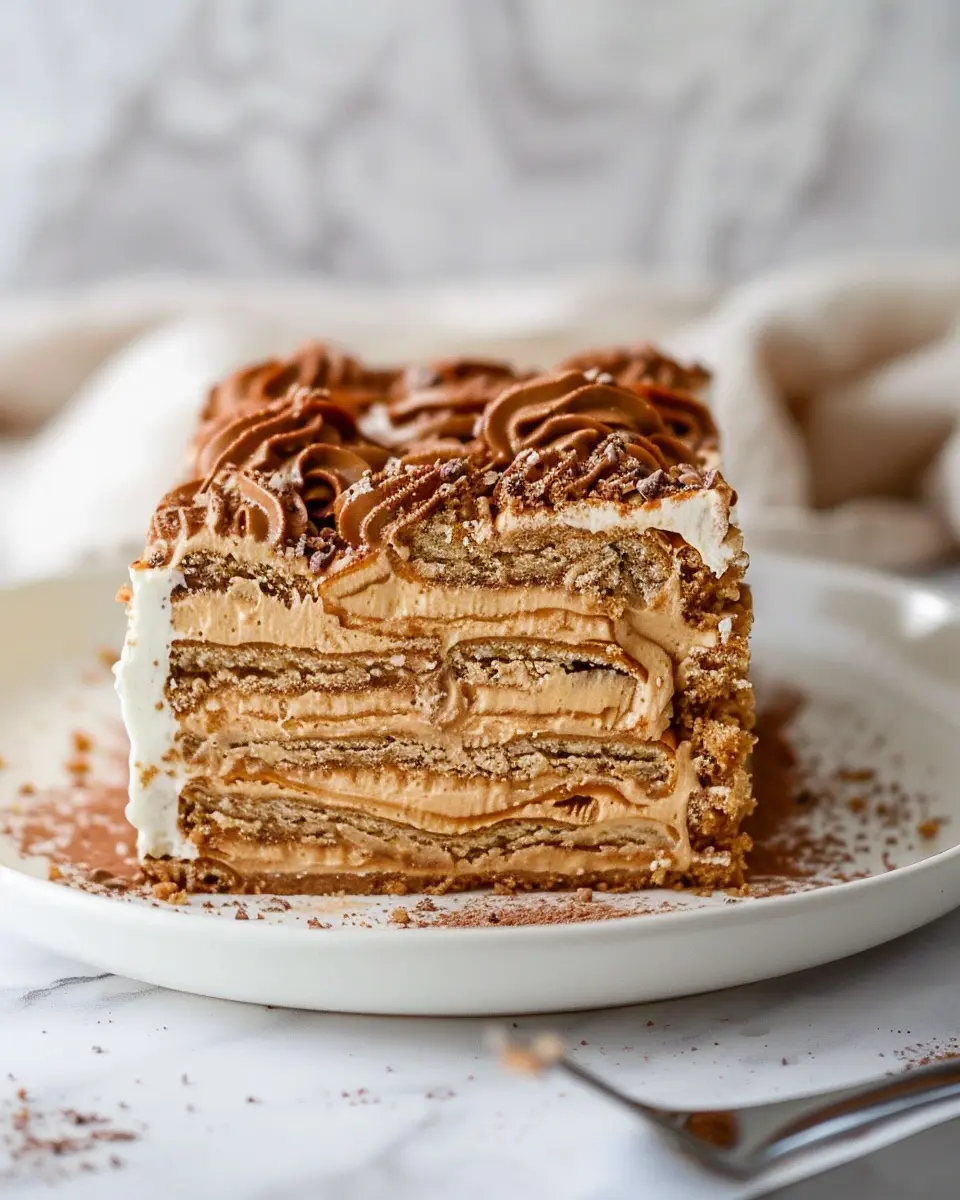
When you’re ready to serve your cookie butter icebox cake, cut it into squares and enjoy this creamy and dreamy delight! You’re bound to impress friends and family with this stunning dessert.
Now that you’re all set, what are you waiting for? Get in the kitchen and whip up this delicious treat today!
Variations on Cookie Butter Icebox Cake
When it comes to the cookie butter icebox cake, your creativity can truly shine. Here are some delightful variations to explore, making each layer of your cake a fresh experience.
Adding Fruit Layers for Freshness
Imagine slicing into your cookie butter icebox cake and uncovering vibrant layers of fruit! Fresh fruits such as strawberries, bananas, or even peaches can add a burst of flavor and a refreshing contrast to the rich, creamy layers.
- Strawberries: Their natural sweetness pairs beautifully with the spiced flavors of cookie butter.
- Bananas: Slices can add a delightful creaminess and balance the cake’s texture.
- Peaches: For a summer twist, try using grilled or fresh peaches. This extra layer not only enhances flavor but also adds a pop of color. Want to know more about how fruits can change desserts? Check out this Dairy-Free Fruit Dessert Guide.
Alternative Cookies for a Twist
While traditional cookies like graham crackers create a base for your cookie butter icebox cake, don’t hesitate to experiment with your favorite cookies. Consider using:
- Gingersnaps: These add a spicy kick that complements the cookie butter beautifully.
- Chocolate Wafer Cookies: For chocolate lovers, this addition can create an indulgent version that’s hard to resist!
- Oatmeal Cookies: The chewy texture gives the cake a unique twist and extra heartiness.
Each of these variations will not only elevate your cookie butter icebox cake but also allow for personalized flavors tailored to your palate. Why stick to one recipe when the possibilities are endless? Dive into your kitchen, get creative, and find the perfect combination that makes this treat uniquely yours!
Cooking Tips and Notes for Cookie Butter Icebox Cake
Importance of Chilling Time
Don’t underestimate the magic of chilling when making a cookie butter icebox cake. Giving your cake ample time in the refrigerator allows the flavors to meld beautifully, resulting in a creamier texture and richer taste. Ideally, let it chill for at least four hours or, better yet, overnight. This helps soften those cookies, creating a delightful, cake-like consistency.
How to Properly Layer the Cake
Layering is essential to achieving that perfect balance of cookie butter and creaminess. Start with a layer of cookies soaked in milk (or a dairy alternative for a lighter touch) as your base. Spread a generous layer of cookie butter mixture on top, then repeat the cookie-soaking and spreading process. Aim for at least three layers to ensure a well-rounded flavor. If you want visual appeal, feel free to add some crushed cookies or a sprinkle of cinnamon on each layer.
Feel free to customize your layers with various types of cookies or additional whipped cream! For more insight on cake layering techniques, check out this helpful guide for step-by-step advice. Happy baking!
Serving suggestions for Cookie Butter Icebox Cake
When it comes to enhancing your cookie butter icebox cake, there are delightful ways to elevate its flavor and presentation.
Drizzling with warm cookie butter
One of the simplest yet most indulgent ways to serve your cake is by drizzling it with warm cookie butter. Just a few seconds in the microwave can turn this treat into a luscious topping that adds an irresistible gooeyness. Pour it over the cake just before serving to create a warm, inviting aroma that will have everyone racing to grab a slice!
Pairing with fresh fruit or chocolate
For a fresher twist, consider pairing your cookie butter icebox cake with fresh fruits like berries, bananas, or even citrus slices. The acidity and brightness of the fruit balance beautifully with the rich and creamy layers of the cake. Alternatively, a sprinkle of chocolate shavings or a dusting of cocoa powder can add visual appeal and a decadent touch.
By combining these suggestions, you’ll impress your guests and turn an already fabulous dessert into a memorable experience. For more serving ideas and dessert inspirations, check out this guide to dessert pairings.
Time Breakdown for Cookie Butter Icebox Cake
Preparation Time
Creating your delicious cookie butter icebox cake takes around 20 minutes of active prep. This includes gathering your ingredients, whipping up the filling, and layering your cookies and cream. It’s a quick process that leaves plenty of time for you to have fun with other parts of your day.
Inactive Refrigeration Time
Now, patience is key! Your cake needs to chill in the fridge for 4 to 6 hours, allowing those flavors to meld and the cookies to soften. This is the perfect time to unwind with a good book or binge-watch your favorite series.
Total Time
In total, you’ll spend about 4 to 6 hours and 20 minutes making this delightful dessert. It’s mostly hands-off, giving you a delicious reward for minimal effort. Remember to check out some tips on refrigeration techniques on Serious Eats for the best results! Why not invite a friend over to share in this blissful treat once it’s ready?
Nutritional facts for Cookie Butter Icebox Cake
Caloric content per serving
When indulging in a delicious cookie butter icebox cake, it’s good to know what you’re savoring! Each serving typically contains around 300-400 calories. While it might feel like an indulgence, sharing with friends or enjoying it as an occasional treat keeps those calorie counts in check.
Breakdown of fats and sugars
Let’s break it down a bit further. This cake tends to be rich, with approximately 20 grams of fat per slice, primarily from the cream cheese and cookie butter. The sugar content can range from 15 to 25 grams, depending on the specific recipe and toppings you choose. Considering how sweet and luscious cookie butter can be, cutting back on additional sweeteners might be a wise move.
For a balanced perspective on dessert, you might find it valuable to explore the American Heart Association for recommendations on sugar intake. After all, treats can be part of a healthy lifestyle when enjoyed mindfully!
FAQs about Cookie Butter Icebox Cake
How can I use different types of cookie butter?
When it comes to making your cookie butter icebox cake, the sky’s the limit! Traditional cookie butter made from Speculoos cookies is a beloved choice, but have you ever considered using flavors like chocolate, almond, or even pistachio cookie butter? Each type offers a unique flavor profile that can elevate your cake! For instance, chocolate cookie butter can add a rich, decadent twist, while almond cookie butter can provide a nutty essence. Just remember to taste-test your combinations to balance sweetness and creaminess—your cake will be a reflection of your creativity!
Can I make this cake ahead of time?
Absolutely! In fact, making the cookie butter icebox cake a day or two in advance might be the best approach. This allows the layers to meld together beautifully, enhancing the flavors. Just assemble the cake and store it in an airtight container in the refrigerator. Be sure to garnish right before serving to keep everything looking fresh and appealing.
What’s the best way to store leftovers?
If you find yourself with leftover cookie butter icebox cake (which is a good problem to have), simply cover it well and keep it in the fridge. It can last for about 3 to 5 days. The layers may soften slightly over time, but the taste will remain delicious. If you want to extend its life even further, consider freezing individual slices, wrapping them well in plastic wrap and then foil. This way, you can enjoy a slice of heaven whenever the craving hits! For detailed freezing techniques, check out this guide from The Kitchn.
Conclusion on Cookie Butter Icebox Cake
Creating a cookie butter icebox cake is a delightful journey that puts you in control of your dessert destiny. There’s something incredibly satisfying about crafting your own sweets, especially ones that require minimal fuss. The combination of creamy layers and spiced cookie butter makes each bite a heavenly experience.
DIY desserts not only save you a trip to the bakery but also allow for personalization. You can swap ingredients, add toppings, or adjust flavors to suit your taste. So why not indulge in this fun and creative process? Your next gathering deserves the sweet touch of a homemade treat. For more dessert inspiration, check out this article on DIY cheesecakes!
PrintCookie Butter Icebox Cake: The Best Indulgent No-Bake Treat
A delightful no-bake treat featuring layers of creamy cookie butter and fluffy whipped cream.
- Prep Time: 20 minutes
- Total Time: 4 hours 20 minutes
- Yield: 8 servings 1x
- Category: Dessert
- Method: No-Bake
- Cuisine: American
- Diet: Vegetarian
Ingredients
- 1 cup cookie butter
- 2 cups heavy cream
- 1/2 cup powdered sugar
- 1 teaspoon vanilla extract
- 12 graham crackers, crushed
- 1/2 cup chocolate chips
Instructions
- In a bowl, mix the cookie butter and powdered sugar until smooth.
- In another bowl, whip the heavy cream and vanilla extract until stiff peaks form.
- Fold the whipped cream into the cookie butter mixture until well combined.
- In a serving dish, layer the crushed graham crackers, followed by the cookie butter mixture. Repeat the layers until ingredients are used up.
- Top with chocolate chips.
- Refrigerate for at least 4 hours before serving.
Notes
- For added flavor, consider adding a pinch of salt to the whipped cream.
- Experiment with different layers, like fruit or nuts, for variation.
Nutrition
- Serving Size: 1 slice
- Calories: 300
- Sugar: 20g
- Sodium: 150mg
- Fat: 25g
- Saturated Fat: 15g
- Unsaturated Fat: 8g
- Trans Fat: 0g
- Carbohydrates: 30g
- Fiber: 1g
- Protein: 2g
- Cholesterol: 60mg
Keywords: cookie butter, icebox cake, no-bake dessert, indulgent treat