Introduction to Healthier No-Bake Cheesecake in a Jar
When it comes to satisfying your sweet cravings without the guilt, no-bake cheesecakes have become all the rage. These delightful desserts offer a creamy texture and luscious flavor with none of the hassle that comes from traditional baking. But what if we could elevate this classic treat even further? That’s where the Healthier No-Bake Cheesecake in a Jar enters the scene.
What’s the buzz about no-bake cheesecakes?
Let’s be honest, life is busy. Between juggling work, social commitments, and those all-important self-care moments, who has time to whip up a complicated dessert? The beauty of no-bake cheesecake lies in its simplicity. Made with easy-to-find ingredients and requiring minimal cookware, this dessert is as effortless to prepare as it is enjoyable to eat.
According to a recent survey, around 70% of young adults prefer desserts that are quick to make and require little cooking. It’s a trend that aligns perfectly with our busy lifestyles. With Healthier No-Bake Cheesecake in a Jar, you can indulge without compromising your wellness goals. This version swaps high-calorie ingredients for lighter, nutrient-dense options. For example, using Greek yogurt not only adds protein but also gives that creamy texture we all love.
How about an unexpected twist? Consider infusing flavors like vanilla bean or fresh fruit purées, which can elevate your cheesecake game from basic to gourmet. Plus, serving this delicious treat in jars not only looks adorable but makes portion control a piece of cake—literally!
For those looking to explore further, check out resources like the American Heart Association for tips on making healthy dessert choices that fit within a balanced diet. You can also find a plethora of no-bake cheesecake variations that can cater to vegan or gluten-free diets.
As we delve into our favorite Healthier No-Bake Cheesecake in a Jar recipe, keep the fun of experimentation in mind. After all, dessert should be something you look forward to, not stress over!

Ingredients for Healthier No-Bake Cheesecake in a Jar
Creating a delicious Healthier No-Bake Cheesecake in a Jar is simpler than you might think! This layered treat not only looks impressive but also allows you to indulge guilt-free. Here’s what you’ll need to whip up this delightful dessert:
Cherry Topping Ingredients
- Fresh cherries (or frozen if you’re short on fresh)
- Honey or maple syrup for sweetness
- Lemon juice to balance the flavors
For an extra burst of flavor, why not check out this guide on fruit toppings to diversify your options?
No-Bake Cheesecake Filling Ingredients
- Cream cheese, preferably low-fat for a lighter option
- Greek yogurt for added protein and creaminess
- Vanilla extract to enhance the flavor
- Sweetener of choice (like stevia or coconut sugar)
Using Greek yogurt not only boosts the nutritional profile but also adds a delightful tanginess!
Graham Cracker Crust Ingredients
- Graham crackers, or try whole-grain varieties for added fiber
- Butter (or coconut oil for a healthier twist)
- Sugar or a sugar alternative to keep it sweet
Do you prefer a nutty crust? Consider substituting some graham crackers with ground almonds—it’s a fantastic way to incorporate healthy fats!
With these ingredients, you’re well on your way to making a Healthier No-Bake Cheesecake in a Jar that will impress both friends and your taste buds!
Step-by-Step Preparation for Healthier No-Bake Cheesecake in a Jar
Creating a Healthier No-Bake Cheesecake in a Jar is not only a fun kitchen project but also an opportunity to impress friends at gatherings or simply indulge in a delightful treat without the guilt. Let’s walk through the preparation of this scrumptious dessert, step by step.
Making the Cherry Topping
To start, let’s create a fresh cherry topping that will add a burst of flavor to your cheesecake. Here’s what you’ll need:
- 2 cups fresh or frozen cherries
- 2 tablespoons honey or maple syrup (adjust based on your sweetness preference)
- 1 tablespoon lemon juice
- 1 teaspoon cornstarch mixed with 2 tablespoons water (for thickening)
- In a saucepan over medium heat, combine the cherries, honey, and lemon juice.
- Cook for about 5–10 minutes, stirring occasionally, until the cherries soften.
- Stir in the cornstarch mixture and cook for another couple of minutes until the mixture thickens.
- Let it cool completely. This cherry topping not only adds a rich flavor but is also packed with antioxidants, making it a healthy companion to our cheesecake.
If you’re looking for more delectable fruit toppings, consider exploring other options like berries or even tropical fruits on sites like Healthline for tips on the health benefits of various fruits.
Whipping Up the Cheesecake Filling
Next, let’s whip up that rich and creamy cheesecake filling. Gather your ingredients:
- 16 ounces of light cream cheese, softened
- 1/2 cup plain Greek yogurt (for added protein)
- 1/4 cup honey or agave syrup
- 1 teaspoon vanilla extract
- 1 tablespoon lemon juice
- In a mixing bowl, beat the softened cream cheese until smooth.
- Add the Greek yogurt, honey (or agave), vanilla extract, and lemon juice to the cream cheese.
- You can use a hand mixer or whisk for about 2–3 minutes until well combined and fluffy. This mixture should be rich yet healthier due to the Greek yogurt, which gives you that creamy texture with fewer calories.
Want to know more about the health benefits of Greek yogurt? Check out Medical News Today for extensive insight!
Crafting the Graham Cracker Crust
No cheesecake would be complete without a crust, and creating a graham cracker crust is simple:
- 1 cup graham cracker crumbs
- 1/4 cup coconut oil, melted (or unsalted butter)
- 2 tablespoons honey
- In a bowl, combine the graham cracker crumbs, melted coconut oil, and honey.
- Mix until the crumbs are fully coated.
- Press the mixture evenly into the bottom of your jars, forming a compact crust layer. This contrasts beautifully with the creamy filling and cherry topping.
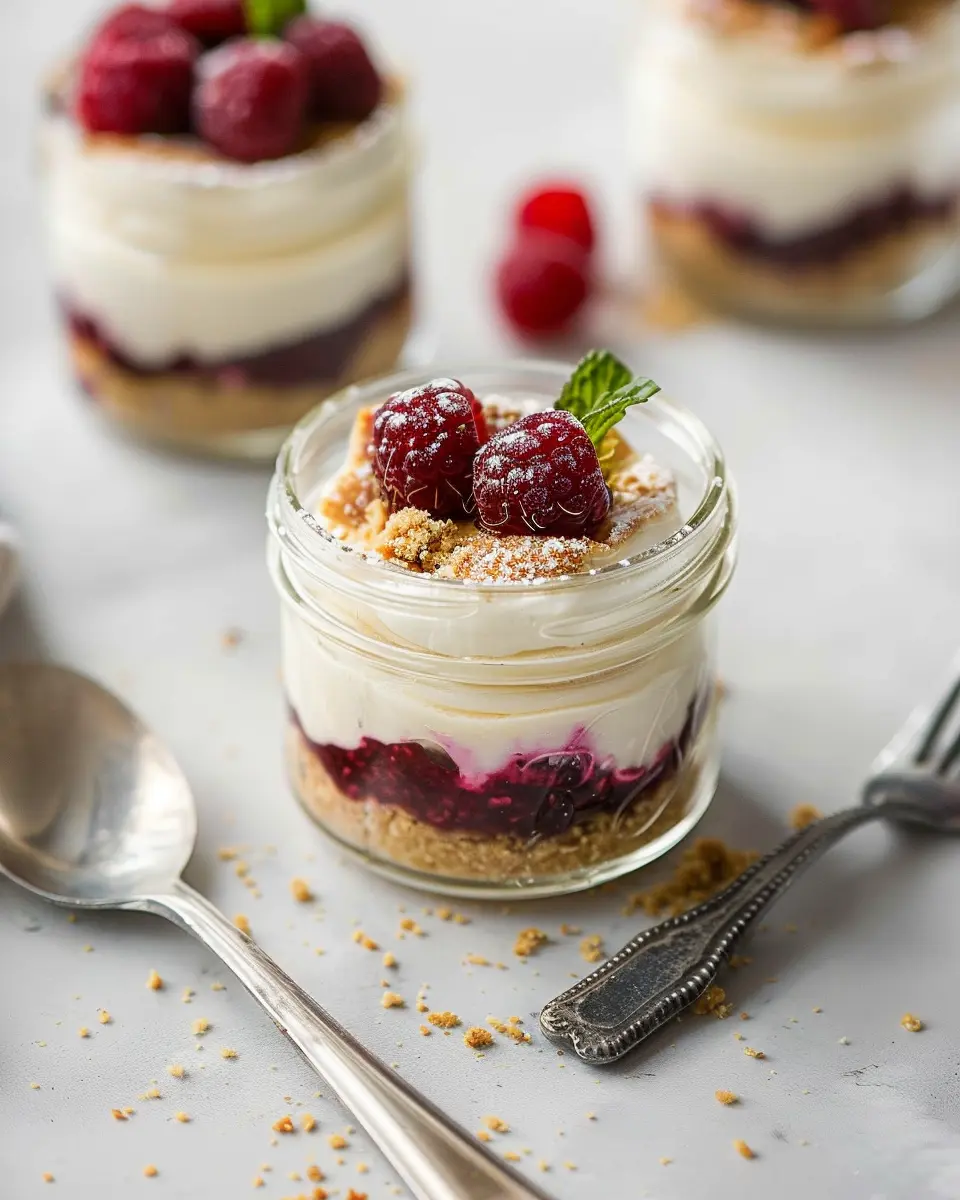
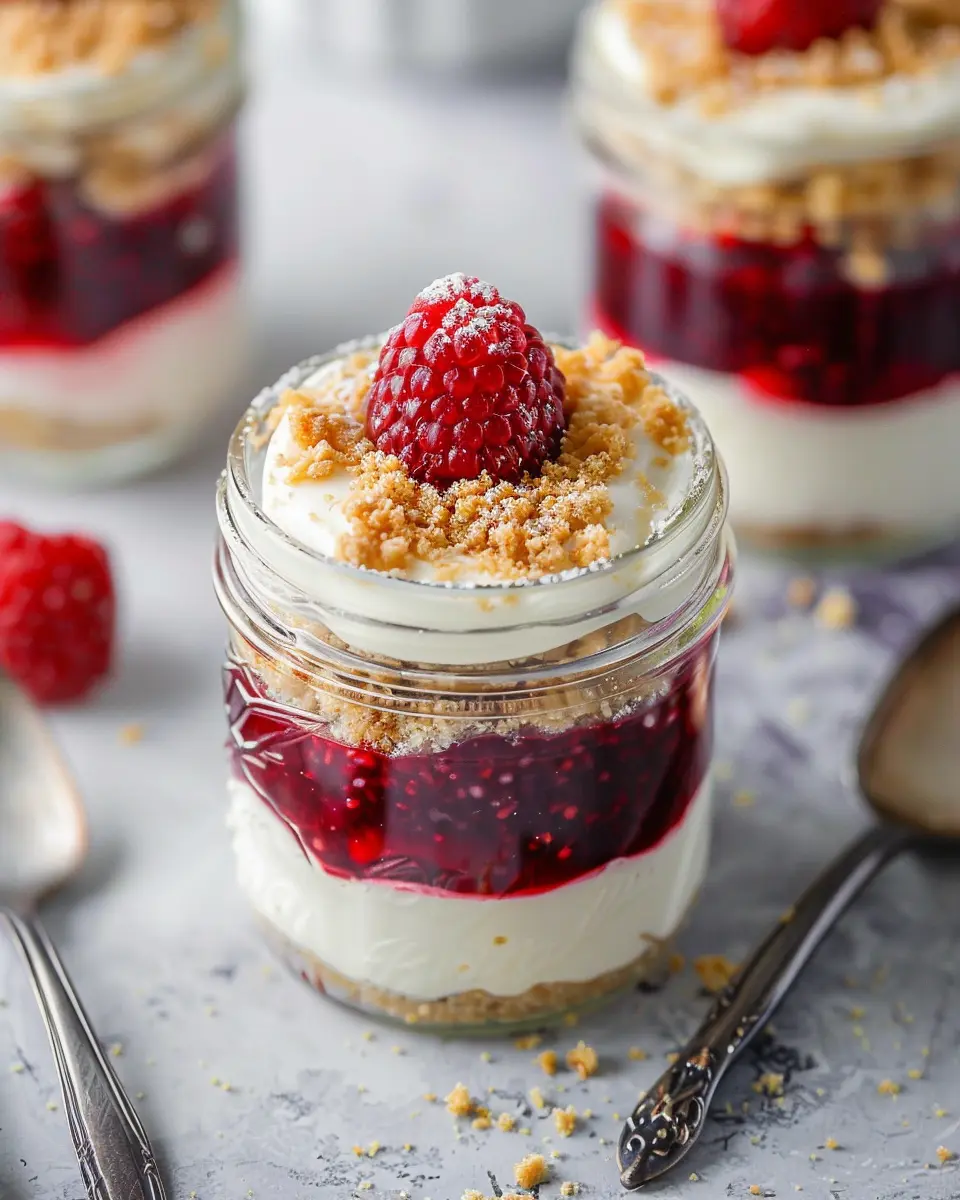
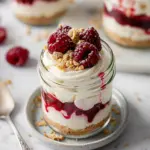
Assembling the Mini Cheesecake Jars
Now comes the fun part—assembling your Healthier No-Bake Cheesecake in a Jar:
- Begin by adding a layer of the graham cracker crust at the bottom of each jar.
- Follow with a generous layer of cheesecake filling. I recommend using a piping bag or spoon for more control.
- Finally, top it off with your cherry topping. Feel free to layer it as you please for aesthetic appeal!
Chilling for the Perfect Texture
After you’ve assembled your jars, it’s crucial to let the cheesecake chill:
- Place the jars in the refrigerator for at least 4 hours, ideally overnight. This step helps the filling firm up and melds the flavors beautifully.
- When you’re ready to serve, consider garnishing with fresh mint or additional cherries for visual appeal.
By following these steps, you’ll end up with a delightful dessert that’s not just easy to make but also healthier than traditional cheesecakes. Enjoy your delicious Healthier No-Bake Cheesecake in a Jar—perfect for a summer treat or a sweet end to a busy day!
Variations on Healthier No-Bake Cheesecake in a Jar
Creating your own Healthier No-Bake Cheesecake in a Jar opens up a world of delicious possibilities! Let’s explore two enticing variations that cater to different cravings.
Berry Medley Cheesecake Jars
If you’re a fan of fresh flavors, the berry medley cheesecake jar is a delightful option. Begin by layering your creamy cheesecake filling with a mix of vibrant berries like strawberries, blueberries, and raspberries. These fruits not only add a pop of color but are also loaded with antioxidants and vitamins.
- To enhance the taste, consider a teaspoon of vanilla extract in the filling.
- Top it off with a sprinkle of crushed graham crackers or nuts for an enjoyable crunch.
Just a warning: once you taste this berry delight, you might find it hard to enjoy plain cheesecake again!
Chocolate Lovers Cheesecake Jars
For those who can’t resist the allure of chocolate, the chocolate lovers cheesecake jar is sure to satisfy. Simply incorporate cocoa powder into your cheesecake filling for rich, decadent flavors.
- Add a layer of chocolate shavings or dark chocolate chips for an extra indulgent touch.
- To sweeten the deal, drizzle a little honey or maple syrup on top before serving.
This chocolate variation not only fulfills your sweet tooth but also provides a delightful twist on the classic cheesecake experience.
With these variations, your Healthier No-Bake Cheesecake in a Jar is not just a dessert; it’s an experience waiting to be shared. Whether you’re hosting a get-together or treating yourself after a long week, these variations ensure you have a delightful option to enjoy. Explore more about healthy ingredients on Healthline or find inspiration on Minimalist Baker. Happy indulging!
Cooking Tips and Notes for Healthier No-Bake Cheesecake in a Jar
Importance of ingredient temperature
When making your Healthier No-Bake Cheesecake in a Jar, the temperature of your ingredients plays a crucial role. Using cream cheese that’s at room temperature allows for a smooth, creamy texture, making it easier to blend with other ingredients. Cold ingredients can lead to lumps, which nobody wants in their dessert! For best results, take your cream cheese out of the fridge at least 30 minutes before you start mixing.
Tips for achieving the right consistency
To ensure your cheesecake filling is perfectly creamy, consider these tips:
- Blend thoroughly: Use a hand mixer or a food processor to achieve that silky consistency. This breaks down any lumps and combines the flavors beautifully.
- Adjust the sweetness: If you’re aiming for a healthier profile, opt for natural sweeteners like honey or agave nectar, adjusting to your taste.
- Chill properly: Once assembled, let your jars chill in the refrigerator for at least four hours. This allows the cheesecake to set and enhances the flavors.
For more insights on cheesecake variations, check out resources like the American Dairy Association for helpful tips!
Serving Suggestions for Healthier No-Bake Cheesecake in a Jar
Creative Toppings to Elevate Your Cheesecake
The beauty of Healthier No-Bake Cheesecake in a Jar lies in its versatility. Enhance your dessert using a variety of toppings:
- Fresh Fruits: Berries like strawberries, blueberries, and raspberries not only look beautiful but also add a burst of natural sweetness and nutrients.
- Nut Butters: A drizzle of almond or cashew butter can bring a creamy texture and rich flavor.
- Granola or Nuts: Sprinkle a little granola or crushed nuts for a satisfying crunch and some healthy fats.
- Cocoa or Caramel Drizzle: For a special treat, top with a bit of dark chocolate or homemade caramel sauce.
These toppings not only make your cheesecake visually appealing but also boost its nutritional profile.
Best Occasions to Serve Cheesecake in a Jar
When should you whip up a batch of these delightful jars? Here are some perfect occasions:
- Summer Picnics: They are portable desserts that are easy to share and eat.
- Birthday Parties: Healthier No-Bake Cheesecake in a Jar can be a great alternative to traditional cake.
- Holiday Gatherings: Impress your guests with an elegant yet simple dessert that caters to those seeking healthier options.
No matter the occasion, these jars are sure to please everyone. Curious about other spin-offs of cheesecake? Check out this delightful cheesecake blog for more inspiration!
Time Breakdown for Healthier No-Bake Cheesecake in a Jar
Preparation Time
Creating your Healthier No-Bake Cheesecake in a Jar is both quick and rewarding! The preparation takes about 15 minutes. Gather your ingredients, mix your filling, and layer it into jars—simple as that. If you want to get fancy, you can even add a touch of fruit or a drizzle of honey on top!
Cooling Time
To let flavors meld beautifully, give your cheesecake jars a cooling period. Aim for at least 1 to 2 hours in the refrigerator. This allows the cheesecake to set properly, giving you that perfect creamy texture.
Total Time
In just about 1 hour and 15 minutes, you can whip up these delightful individual cheesecakes. It’s a delicious dessert that’s perfect for busy weeknights or a sweet treat for your weekend gatherings with friends.
For more tips on crafting delightful desserts, check out some helpful guides on sites like The Kitchn or Epicurious. Have you tried adapting other classic recipes into lighter versions? It’s a fun way to enjoy your favorites without the heavy guilt!
Nutritional Facts for Healthier No-Bake Cheesecake in a Jar
When dessert time rolls around, you can indulge without guilt with this Healthier No-Bake Cheesecake in a Jar. Let’s break down the nutritional facts to help you enjoy every delicious bite.
Calories
Each serving contains approximately 180 calories. This makes it a delightful treat that won’t derail your health goals. Control your portions, and you can relish every layer!
Sugars and Proteins
You’ll find around 10 grams of sugar and 8 grams of protein per serving. The reduced sugar content is a great way to satisfy your sweet tooth without the sugar crash later. Plus, the protein helps keep you feeling full.
Serving Size Information
This recipe yields four individual jars, making them perfect for sharing or savoring throughout the week. Each jar is a satisfying portion, ideal for a quick snack or dessert.
For more insights on healthy dessert options, you might want to check out Healthline for tips on sugar substitutions!
FAQs about Healthier No-Bake Cheesecake in a Jar
Can I use alternative sweeteners in the recipe?
Absolutely! One of the best aspects of this Healthier No-Bake Cheesecake in a Jar is its adaptability. You can easily swap out traditional sweeteners for alternatives like honey, maple syrup, or stevia. Just remember that different sweeteners have varying levels of sweetness, so taste as you go. For instance, if you’re using stevia, you might need much less than sugar.
How long do these cheesecakes last in the fridge?
You might be wondering how long you can indulge in this delicious treat. When stored properly, your Healthier No-Bake Cheesecake in a Jar can last in the fridge for about 4-5 days. Make sure to keep the lids on tightly to maintain freshness. This makes it a perfect option for meal prepping healthy desserts throughout the week.
What’s the best way to store leftover cheesecake jars?
Storing your cheesecake jars is pretty straightforward. Use airtight containers to prevent any moisture from seeping in, which could affect the texture. If you want to freeze them for longer storage, consider placing them in freezer-safe jars. Just remember to leave some space at the top, as the filling may expand when frozen. You can find more storage tips at sources like Harvard Health to ensure your desserts stay delightful.
Feel free to get creative with flavors and toppings too! With all the options available, you can be the healthier dessert champion at your next gathering. Happy cheesecaking!
Conclusion on Healthier No-Bake Cheesecake in a Jar
In wrapping up our delightful journey to create a Healthier No-Bake Cheesecake in a Jar, let’s reflect on the pure joy of making homemade desserts. Crafting sweets from scratch not only gives you the satisfaction of knowing exactly what goes into your treats, but it also opens the door to endless customization possibilities.
Imagine savoring a creamy cheesecake layer paired with fresh fruit or a sprinkle of nuts, all in an adorable jar you crafted. It’s a fun and interactive dessert that’s perfect for sharing with friends or simply indulging in after a long day.
For those seeking more creative inspirations, check out resources like The Kitchn and EatingWell for healthful dessert ideas that keep your taste buds dancing.
PrintHealthier No-Bake Cheesecake in a Jar: A Guilt-Free Delight
Enjoy a deliciously creamy and guilt-free dessert with this Healthier No-Bake Cheesecake in a Jar!
- Prep Time: 15 minutes
- Total Time: 2 hours 15 minutes
- Yield: 4 servings 1x
- Category: Dessert
- Method: No-Bake
- Cuisine: American
- Diet: Healthy
Ingredients
- 1 cup Greek yogurt
- 1/2 cup cream cheese
- 1/4 cup honey or maple syrup
- 1 teaspoon vanilla extract
- 1/2 cup crushed graham crackers
- 1/4 cup melted butter
- 1 cup mixed berries
Instructions
- In a mixing bowl, combine the Greek yogurt, cream cheese, honey (or maple syrup), and vanilla extract. Mix until smooth.
- In another bowl, mix the crushed graham crackers with melted butter until well combined.
- Layer the bottom of jars with the graham cracker mixture.
- Add a layer of the cheesecake mixture on top of the crust.
- Finish with a layer of mixed berries on top.
- Repeat the layers until the jars are full.
- Chill in the refrigerator for at least 2 hours before serving.
Notes
- For a lower-calorie version, use low-fat cream cheese.
- Feel free to add other fruits like bananas or peaches.
Nutrition
- Serving Size: 1 jar
- Calories: 200
- Sugar: 10g
- Sodium: 150mg
- Fat: 8g
- Saturated Fat: 4g
- Unsaturated Fat: 3g
- Trans Fat: 0g
- Carbohydrates: 24g
- Fiber: 2g
- Protein: 6g
- Cholesterol: 20mg
Keywords: Healthier No-Bake Cheesecake, Guilt-Free Cheesecake, Cheesecake in a Jar